
Imagine that you are hosting a summer barbecue! You are holding your favorite drink in hand. You are walking and suddenly, thunk!!!!!!! Your foot slips into a gap between your deck boards.
Embarrassing & Dangerous!
Although the small gaps between deck boards may not look dangerous at first glance, but they are a big safety concern.
Need a decent repair, but not a complete rebuild? These are the steps that have been known to work and help you get your deck back to a smooth, safe and flawless appearance.
Let’s discover how to fix deck board gaps.
Why Deck Boards Develop Gaps
Know the reasons behind the presence of gaps before you correct the problem. Common reasons include:
Wood Shrinkage -Wood will swell and shrink with moisture. Boards may shrink due to seasonal changes which leave spaces in them.
Inadequate installation- The boards that were not spaced and fixed appropriately may drift apart with time. • Warping and
Weather Damage The rain, snow, and sunlight may cause boards to be warped, cracked, or split.
Fastener Problems -The loose screws or nails enable the boards to move and create openings.
The cause of the problem will help you select the correct solution and prevent the problem in the future.
Equipment and Supplies You Need to Repair Deck Boards.
Prepare the following tools before you start:
– Measuring tape
– Deck screws or nails
– Rubber mallet
– Wood filler or deck gap filler
– Deck board spacers
– Drill or hammer
– Sandpaper
The presence of everything facilitates the process of repair, making it much easier and quicker.
How to close the gaps between the deck on a step-by-step basis.
Inspect the Deck
Go and inspect your deck, searching for where it is loose or warped, or where there are broad cracks. Mark down the boards that require attention.
Clean Between the Boards
Gaps can be made wider with debris, dirt and leaves. Clear the spaces using a sweeper or a pressure washer. A clean surface would provide a better adhesion of fillers or new screws.
Tighten Loose Boards
Make sure that all fasteners are tight. Install any lost or broken screws or nails. This is a basic move that can instantly limit small loopholes.
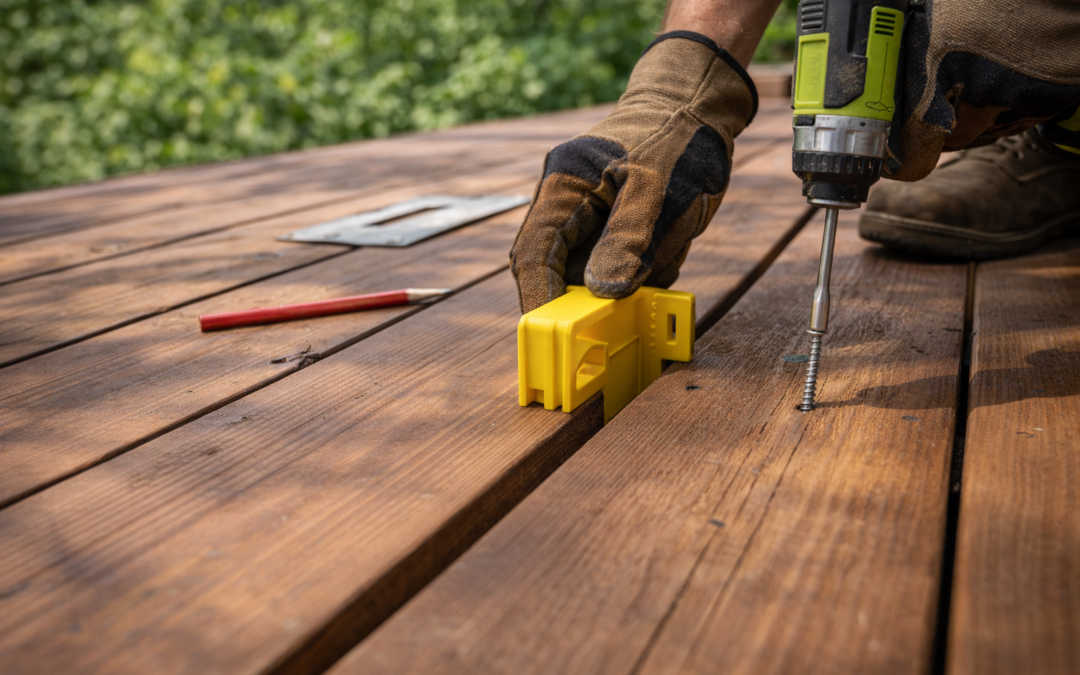
Add Shims or Spacers
When the gap is greater, put a piece of wood shim or deck spacer under the board to reposition it. Tap it softly by using a rubber mallet. This creates equilibrium and balance.
Fill Minor Gaps
Small spaces should be filled with weather-resistant exterior wood filler. Use a putty knife, apply it with care, smooth the surface as the manufacturer directs and allow it to dry.
Replace Damaged Boards
In case the board is warped, split or generally damaged, leave it off and put in a new one. Measuring is important to ensure correct spacing, and the screws used should be weatherproof to ensure that the results are permanent.
Sand and Seal
When everything has been fixed, lightly sand the repairs so that they are smooth. Use a quality deck sealant or stain to prevent moisture, sun damage and eventual shrinkage of the wood.
Preventing Future Gaps
Maintain your deck to be the best all year round by:
– Proper spacing (1/8 to 1/4 inch) when installing.
– Moving the trash often and checking it periodically or in case of damage.
– Apply a sealant on an annual basis to avoid moisture that causes shrinkage.
– Do not use cheap or untreated wood that is easy to warp.
Wrapping up…
Deck gap repairs do not need to be complex. Your deck can remain beautiful and safe for many years with the right tools, patience and the right techniques. Small holes should not become large issues; fix them today and have a perfect outdoor space.
One last tip to achieve excellent results! Make sure to always match fillers and sealants with your deck’s wood type and color for a perfect look. For further assistance, you may contact Decks N’ Stones, and we will fix all big and small issues that your deck is facing.