
You love your paver patio, walkway, or driveway. It adds so much character to your home. But then you see it. A dip where water pools after it rains. A paver that wobbles when you step on it. That once-perfect surface is now uneven and sunken. Your first thought might be a huge, expensive project to rip everything out and start over. But wait. You can often fix sunken or uneven pavers without replacing a single one. This guide will walk you through the process. It is a manageable do-it-yourself project. It will save you significant money and restore the beauty and safety of your paved surface.
Why Your Pavers Sink or Settle
Before you grab your tools, it helps to know why this happens. You are not just fixing a symptom. You are solving the underlying problem. Most sinking occurs due to issues with the base underneath the pavers.
The Common Culprits Behind the Problem
A poor base is the number one reason. If the gravel and sand base was not compacted correctly during installation, it can wash away or compress over time.
Erosion from water runoff is another major cause. Water finds its way between the pavers. It slowly washes away the fine sand in the joints and the base material beneath. This creates empty pockets. Soil compaction from heavy weight, like a car parked on a driveway not meant for it, will also cause settling.
Even tree roots searching for water can push up from below and disrupt the level surface. Understanding these causes helps you prevent the problem from happening again after you fix it.
The Tools and Materials You Will Need
You do not need a garage full of specialized equipment for this job. Most of these items are readily available at your local home improvement store.
Gathering Your Supplies
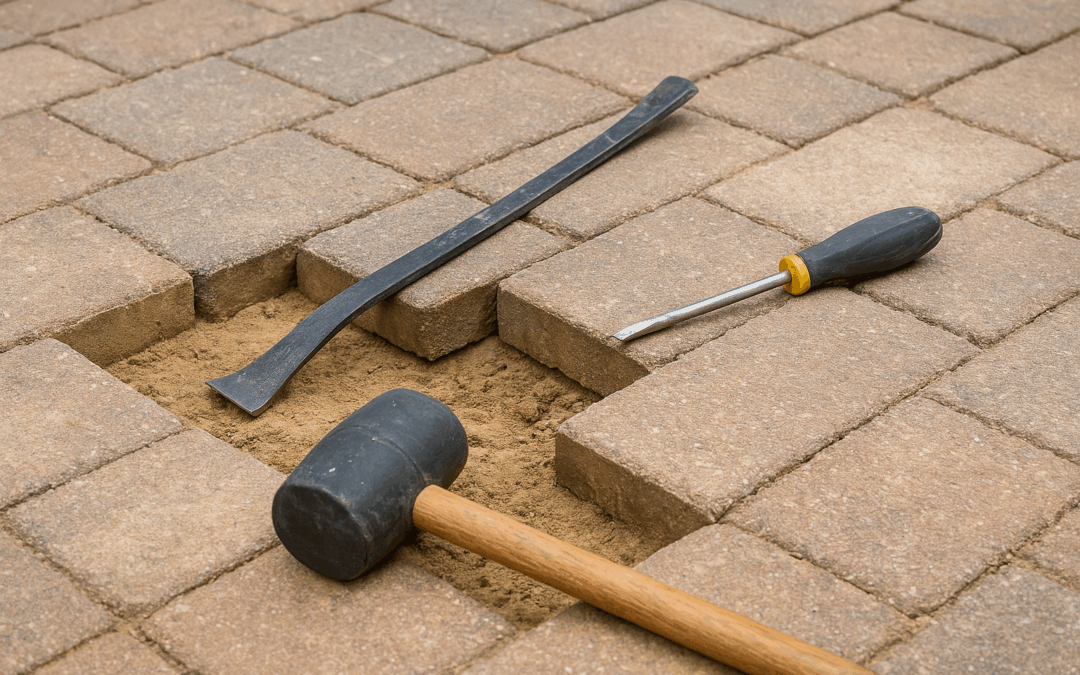
You will need a few key things. A pry bar or a flat-head screwdriver is essential for lifting the pavers. A rubber mallet will help you tap them back into place without causing damage. You need a shovel and a wheelbarrow for mixing materials. A hand tamper or a plate compactor is crucial for compressing the base. For the actual lifting, you have a choice of materials. We will discuss those next. You will also need new polymeric sand or jointing sand to refill the gaps between the pavers. Do not forget safety gear like gloves and safety glasses.
Your Step-by-Step Guide to Fixing Sunken Pavers
Now, let us get to the actual work. Follow these steps carefully for a professional and lasting result.
Step 1: Preparing the Work Area
Start by removing any debris from the surface of the pavers. Sweep it thoroughly. If you are using polymeric sand later, you must ensure the pavers are completely dry. If you are using the slurry method, a little moisture is fine. Identify all the sunken or wobbly pavers in the area. Mark them with a piece of chalk. This helps you keep track.
Step 2: Carefully Remove the Pavers
This step requires patience. Use your pry bar or a flat-head screwdriver. Gently work it into the joint next to the sunken paver. Slowly lever the tool upwards. T
ry to lift the paver straight up. Avoid prying at an angle. This can chip the edges of the paver or its neighbors. Once the paver is loose, lift it out and set it aside on a towel or grass.
This prevents it from getting dirty or damaged. Now, remove the surrounding pavers to create a work area large enough to address the base problem. You do not need to remove the entire patio. Just a section slightly larger than the sunken area.
Step 3: Excavating and Preparing the Base
Look into the hole you have created. You will likely see washed-out sand and a compromised base. Use your hand trowel or shovel to remove the unstable sand and gravel. Dig down until you reach firm, compacted base material. You need a stable foundation to build upon.
Step 4: Lifting and Leveling with Your Chosen Material
This is where you use your chosen lifting method.
If using polyurethane foam: Follow the manufacturer’s instructions exactly. Typically, you drill small holes into the pavers you set aside. You then place the pavers back in their original positions. You inject the foam through the holes. The foam expands and lifts the paver to the correct height. You check with a level and make minor adjustments before the foam sets.
If using a sand slurry: You do not put the pavers back first. Instead, pour your prepared slurry into the excavated hole. Pour slowly. Fill the cavity until the slurry is just below the level where the paver base should be. Do not overfill. The goal is to have the slurry support the base, not spill over it.
Step 5: Replacing and Setting the Pavers
Once your lifting material is in place, it is time to put the pavers back. For the slurry method, place the pavers back into their original spots. Gently tap each one down with your rubber mallet. Use a long level or a straight 2×4 across multiple pavers. Check that they are even with the surrounding ones. Make small adjustments by tapping high corners down or adding a little extra slurry under low spots.
Step 6: Locking Everything in Place with New Sand
The final step is to resand the joints. Pour dry polymeric sand or regular jointing sand over the entire repaired area. Sweep the sand back and forth, pushing it into all the cracks between the pavers. For polymeric sand, you will then need to lightly mist the area with water. This activates the polymers, causing the sand to harden. This locked-in sand is what gives your paver surface its strength and stability. It prevents weeds and stops ants from building nests.
A good repair should last for years. But you can take simple steps to make it last even longer.
Conclusion
Inspect your pavers once or twice a year. Look for new dips or areas where the joint sand is washing out. Replenish the joint sand as needed. This is the simplest form of maintenance. Control water runoff from your roof or yard. Make sure downspouts direct water away from your paved surfaces. If you have a paver driveway, avoid parking hefty vehicles in the same spot every day. Seal your pavers every few years. A good sealer helps lock the sand in place and protects the pavers from stains and weathering.
Frequently Asked Questions
No, this is a temporary fix at best. The sand on top will not address the hollow base underneath. The paver will sink again very quickly. You must address the base to achieve a permanent solution.
It is very fast. The foam typically expands and sets within 10 to 15 minutes. It reaches most of its strength within an hour. You can usually walk on the repaired area within 30 minutes.
Yes, it is possible. However, you will likely need to remove a few of the surrounding pavers to properly access and repair the base beneath the sunken one. Pavers are an interlocking system.
It can be difficult to get a perfect match. Sun and weather fade the existing sand. You may need to resand a larger section or the entire area for a uniform appearance. Buying the same brand and color of sand you used originally gives you the best chance.
If a very large area is sinking, or if the problem is caused by a major issue like a broken underground pipe or significant tree root damage, call a professional. They have the tools and expertise to diagnose and solve complex underlying problems.